Your shop's settings
The shop's name, logo and currency, the extras you can switch on for your website, and which emails go out to customers.
These are the screens you fill in once, near the start, and then rarely open again. They decide your shop's name, its logo, the currency on every price, and a handful of things your customers see while they buy.
Where the settings live#
Open Settings from the bottom of the sidebar, under the grey title System. You land on a page of coloured tiles — one tile per area. A tile you have never filled in says Add now; once saved it says Added and also appears as a row in the table below the tiles.
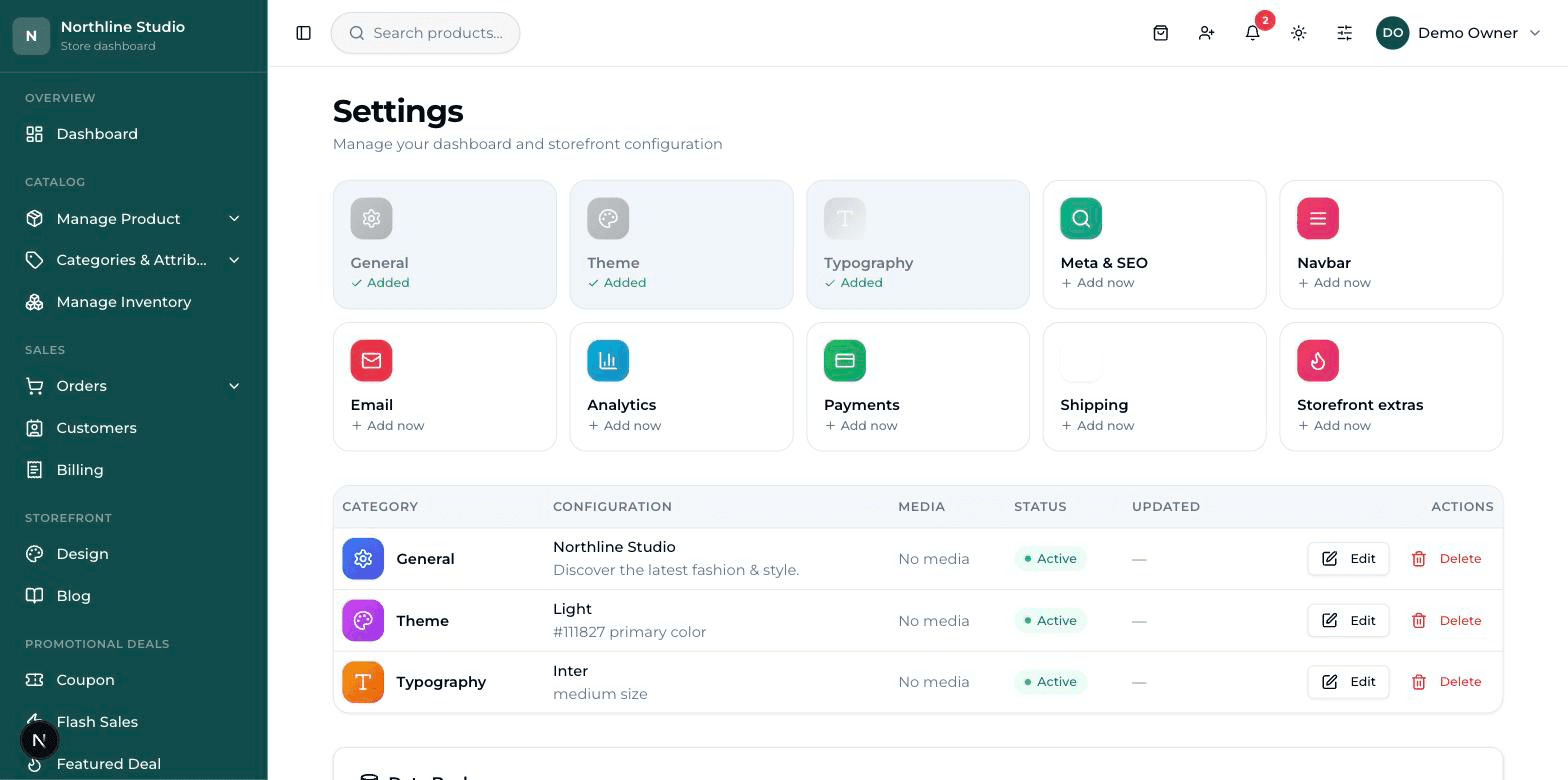
General — name, logo and currency#
Do this one first. Your shop name goes in the browser tab, at the top of every email you send, and on every invoice — so it is worth getting right before anything else.
- Open Settings and click the General tile.
- In Site Name / Topbar Title type your shop's name. This one is required — the Save button stays greyed out until it has something in it.
- In Site Description write one line about what you sell. Google often shows this line under your shop's name.
- Press Save Settings at the bottom right. The page goes back to the Settings list and the General tile now says Added.
Logo, sticky logo and favicon#
Three pictures, three jobs. The card is called Logo & Branding and each one has its own Upload button.
- Site Logo — the big logo at the top of your website. PNG or JPG, up to 2MB. Press Upload Logo, pick the file, and the small square next to the button fills with your picture.
- Sticky Logo — the smaller version shown once the visitor scrolls down and the menu bar shrinks. If you have no separate one, upload the same file.
- Favicon — the tiny picture in the browser tab, next to your shop's name. 16×16 or 32×32 pixels, up to 1MB. A square image works best; a wide logo becomes an unreadable smudge at this size.
Currency#
Two boxes on the same General page. Currency symbol is what is printed before every price — Rs, $, €, £, ₹. Currency code is the three-letter code (PKR, USD, EUR) that Google and the payment gateways read.
Storefront extras#
One page of switches, each one a small thing your customer sees while buying. Every switch is off to begin with, so nothing here changes your site until you turn it on. Turn a switch on and its own boxes appear underneath it.
| Switch | What the customer sees |
|---|---|
| Stock urgency | “Only 3 left” on a product whose stock has dropped to the number you set in Show when stock ≤. |
| Delivery estimate | A line on the product page, in your own words — whatever you type in Delivery estimate text, e.g. “Delivery in 3–5 business days”. |
| Trust badges | A row of short reassurances at checkout. Press Add badge, put an emoji in the small box and the words in the wide one. |
| Delivery date picker | The customer picks the day they want the parcel. Add time slots (Add time slot) and they pick an hour too; with none, only a date. |
| Gift wrapping | A tick-box at checkout with your Label and Fee (Rs). The fee is added to the order total. |
| Tax | A tax line at checkout — your Label (GST, VAT…) and Rate (%). Read the warning below before you use this. |
| Order review step | One last screen showing everything before the order is placed, so the customer can check it. Fewer wrong addresses. |
| Require login for checkout | ON — the buyer must make an account first. OFF (normal) — they can buy as a guest, with just their details. |
Tax — read this twice#
Inside the Tax card there is a second switch called Prices include tax, and it changes what actually happens to the money.
- Prices include tax OFF — the tax is calculated and ADDED on top of the total. A Rs 1,000 order at 5% becomes Rs 1,050.
- Prices include tax ON — nothing is added. The total stays Rs 1,000 and the tax is only shown as a note, because you are saying your prices already contain it.
The “someone just purchased” popup#
A small box that slides into the corner of your website saying something was just bought. The customer's name is never shown — only the word “someone”. The Source dropdown gives you three choices, and they are not equal.
- Real orders (recommended) — real sales, with the real time. If nobody has bought anything yet, nothing shows at all. This one is always true.
- From the product list — any item from your catalogue, with an invented time. Nothing it says actually happened.
- Choose products myself — only the products you pick, again with an invented time. Pick nothing and the popup stays hidden.
Email — who it comes from, and which ones go out#
Two cards. The first, Sender, decides how your emails look to the customer. The second, Notifications, decides which emails go at all.
- Open Settings and click the Email tile.
- In Sender name type the name the customer should see the mail from — usually your shop's name.
- Fill Reply-to email with the inbox you want replies to land in, and Support email plus Support phone with the details printed at the bottom of every mail.
- In the Notifications card, switch each email on or off.
- Press Save changes. A green message confirms it.
| Notification | Sent when |
|---|---|
| Order confirmation | A customer places an order. |
| Shipped | You mark the order shipped — this is the mail that carries the tracking link. |
| Delivered | You mark the order delivered. |
| Cancelled | An order is cancelled. |
| Abandoned cart reminder | Never on its own. It only allows you to send a reminder by hand from the Abandoned Cart page. |
Who is allowed to change settings#
Only two roles: the owner account (Super Admin) and an Admin. A manager, a cashier or an accountant does not even see Settings in their sidebar — that is on purpose, because one wrong number here changes every order that follows.
Save is per screen
Each settings screen has its own Save button and saves only itself. Filling in General does not save Storefront extras — press Save on every screen you touch before leaving it.