The blog on your website
Where a customer sees your articles, how they get there from the shop, and the settings that change how the blog looks.
You have written an article and published it. This page is about the other side of it: what a visitor actually sees, and how they find their way to it.
The blog page#
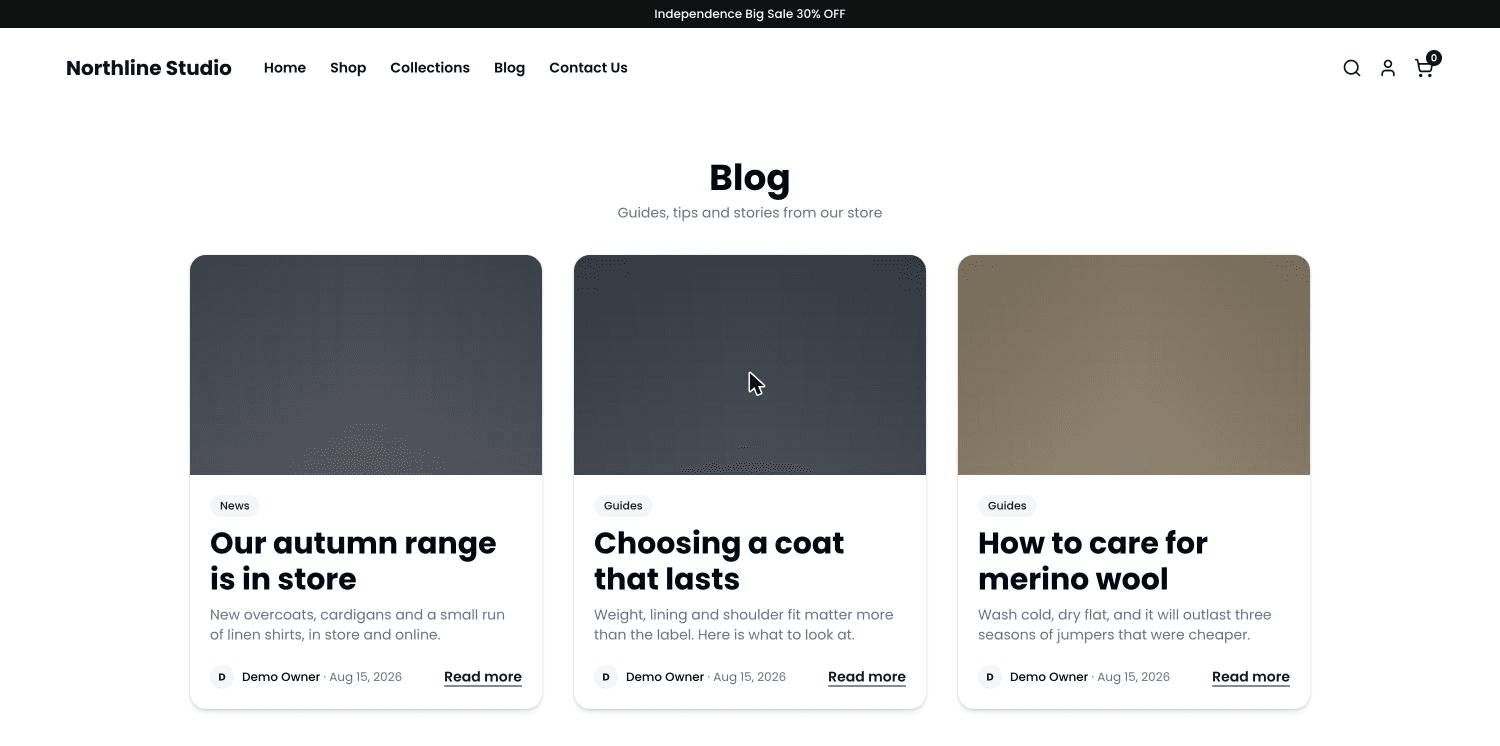
Every published article appears on one page of your website: your web address with /blog added to the end. At the top is a heading and a line under it; below that, a box for each article with its cover picture, its title and its excerpt.
- The newest article is first. You cannot pin one to the top — the order is by date.
- Twelve articles show at a time; if you have more, page numbers appear at the bottom.
- Only published articles are here. Drafts are not, ever.
How a customer gets from your shop to the blog#
Four ways, and it is worth making sure at least the first one is there.
- The menu at the top of your website. If you have never changed your menu, a Blog link is already in it. If you or your provider have set up your own menu, Blog is only there if it was added.
- A blog strip on your home page — a row of your latest articles, added from the home page builder.
- Related articles at the bottom of an article — once a reader is inside one, the next ones are offered to them.
- Search engines. Published articles are included in the list of pages your site hands to search engines automatically; drafts are not.
Putting Blog in your menu#
- Open your own website first and look at the menu across the top. If Blog is already there, you have nothing to do.
- If it is not, go to Settings, then Navbar in the dashboard, and add an item.
- The page list does not offer Blog, so choose Custom link, write Blog as the label and /blog as the address.
- Save, then open your website again — Blog is now in the menu and clicking it opens your blog page.
A row of articles on the home page#
Your home page is built out of strips, and one kind of strip is Blog. Add it and your latest articles sit on your home page, with a How many latest posts box to say how many, and a View all button under them that goes to your blog page. The home page builder is explained in the Design section.
What a reader sees on one article#
- A small trail at the top — Home / Blog / the title of the article — and a Back to blog link.
- The title, then a line with the author name, the date, and how long it takes to read.
- The cover picture, then everything you wrote.
- Under it: Share buttons for Facebook and WhatsApp and a copy-the-link button, an optional box about the author, and Related articles.
Changing how the blog looks#
The look is set in one place, and it is separate from the writing. The screen is called Blog Design and there are two ways in: the Blog Design button on your Blog screen, or the Blog Display tile on the Design screen. It is the same screen either way.
| Card on that screen | What it changes |
|---|---|
| Blog Page (list) | The Page title and Page subtitle printed at the top of your blog page, whether the articles sit in a grid or a sliding row (Layout), how many fit across on a computer and on a phone (Columns), and the Card style of each article box. |
| Blog Detail Page | How one article reads — Page style (Centered, Hero or Magazine), how wide the writing runs (Content width), and switches for Author, Date, Reading time, Cover image, Breadcrumbs and the Back to blog link. |
| Blog Detail – Extras | Share buttons on or off, an author box with a line of your own writing, and Related articles with its heading and how many to show. |
- Open Blog Design and change what you want. Picking a Card style or a Page style shows you a small picture of it first.
- Press Save changes at the bottom. A green message says Blog display saved.
- Open your blog page on your website and then open one article. Both should now look the way you set them.
Check it the way a customer would#
- Open your own website — not the dashboard — and click Blog in the menu. Your published articles should be there, the newest first.
- Open one. Read it from top to bottom the way a stranger would.
- Press the copy-the-link button and send that link to yourself on WhatsApp. Open it from there — that is exactly what a customer will get.
- Do the whole thing again on a phone. Most of your readers will arrive on one.
If your blog is empty on the website
It says No posts yet when there is nothing published. Open Blog in the dashboard and look at the badges — an article with a grey Draft badge is written but not live. Turn its switch to Published (live) and it appears.