Pages
Every page of your website in one place — the ones you were given, how to make your own, how to build one out of sections, and how it reaches the menu.
Pages is the map of your website. Every page is a tile, and every page is built out of sections in exactly the same way — including the homepage.
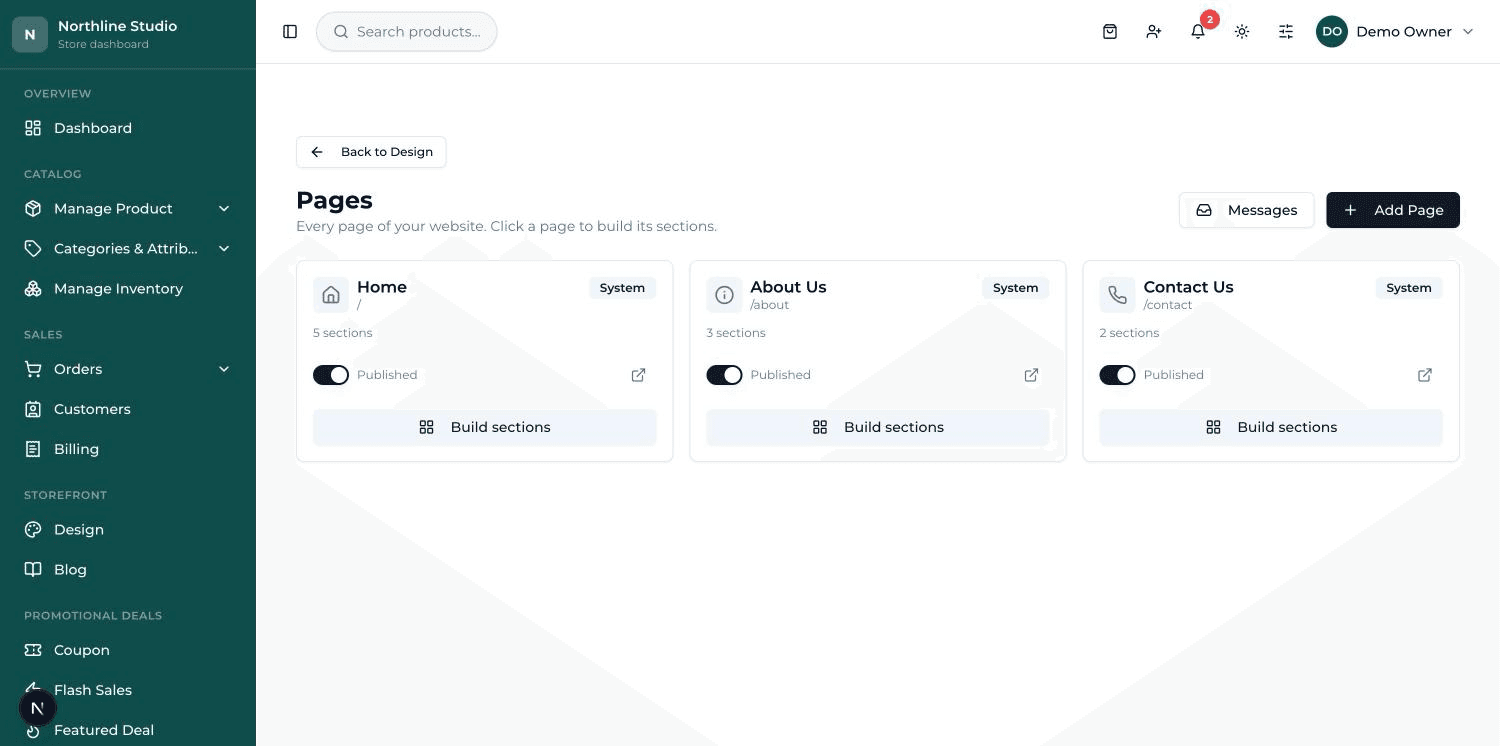
The pages you already have#
Three pages come with your shop and carry a System badge: Home, About Us and Contact Us. System means they are part of the shop and cannot be deleted — but everything inside them is yours to change.
- Each tile shows the page name, its address on the website, and how many sections it has.
- The small arrow-out button opens that page on your real website, in a new tab.
- The switch says Published or Hidden. Hidden means visitors cannot see it.
Making your own page#
- Press Add Page at the top right.
- A box opens headed Add a new page. Type the name in Page name — for example Sale, or Offers, or FAQ.
- Underneath you will see the address it will get, like /sale. That is what customers will type or click.
- Press Create page. The new tile appears with a Custom badge and zero sections.
Building a page out of sections#
A brand new page is empty. You fill it exactly the way you fill the homepage — one block at a time.
- Press Build sections at the bottom of the page's tile (clicking the tile's name does the same thing).
- You land on a screen headed with the page's name and the word Sections.
- Press Add Section and build the block just as you would on the homepage — pick a block from the Section library, fill in the Content, choose the Design, press Create section.
- The link at the top left, ← All pages, brings you back to the map.
Blocks that suit an About or Contact page
About: a Hero at the top, then Rich text or Text + Image for your story, then Team, then Stats. Contact: a Hero, then Contact form, then Map. Everything else in the library works too — those are just the ones that read well.
Publishing and hiding a page#
The switch on each tile flips between Published and Hidden. A hidden page still exists with all its work in it — visitors just cannot reach it.
Getting your page into the menu#
This is the step people forget. Making a page does not put it in the menu at the top of the website. Nobody will find it until you add the link yourself.
- Make sure the page's switch says Published.
- Go to Design → Navigation and scroll to the card headed Menu Links.
- Press Add menu item. A new row appears.
- Open the dropdown on the left of that row. Your published pages are listed there by name. Pick yours — the wording and the address fill in on their own.
- Move it with the small arrows to where you want it in the menu, then press Save Settings.
- Open your website. The link should now be in the menu across the top, and clicking it should open your page.
Ordering and deleting your own pages#
- The up and down arrows on a Custom tile change the order they sit in on this screen. System pages stay pinned at the top.
- The bin button on a Custom tile deletes it. A box asks you to confirm first.
- System pages have no arrows and no bin — they cannot be deleted. Set the switch to Hidden instead.
Where contact-form messages land#
If a page has a Contact form section, what visitors write in it is kept for you to read. The Messages button at the top of the Pages screen opens the list.