Adding a product
The Add Product form, box by box, in the order it appears on your screen.
This is the longest form in the dashboard, and most of it is optional. Four boxes matter: the name, the price, at least one category and one photo. Everything else can be filled in later.
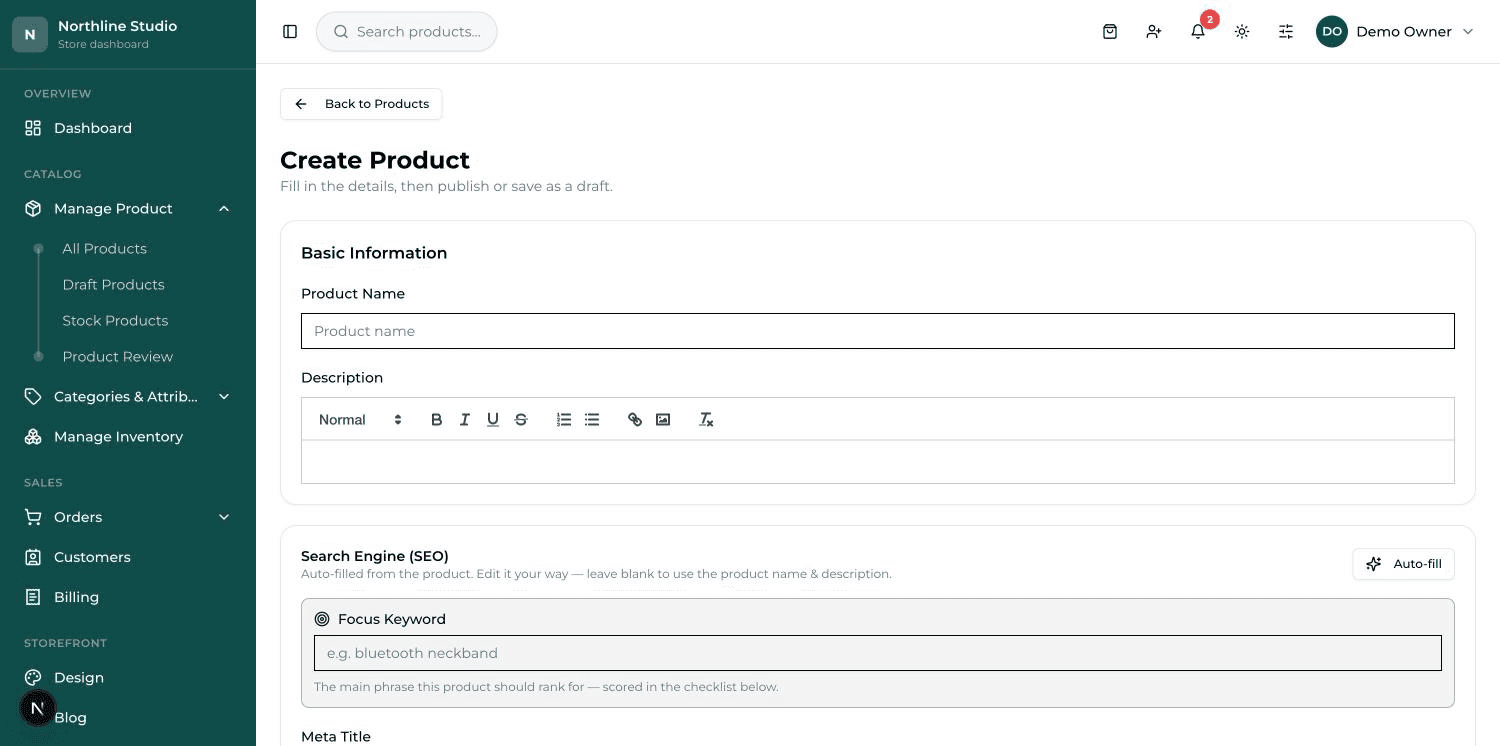
Basic Information#
- Product Name — write it the way a customer would search for it, not the way it is written on your invoice. Add the size or the colour if that is what tells two of your items apart.
- Description — the box underneath is a small word processor. You can make text bold, add a list, or paste from anywhere. This is what a customer reads on the product page.
Search Engine (SEO)#
SEO simply means: what Google shows about this product when someone searches. You can skip this whole card — leave it blank and the product name and description are used. Filling it in gives you control over the exact line people read in Google.
- Focus Keyword — the one phrase you want this product to be found by, like bluetooth neckband. It is not shown to anyone; it is only used to score the checklist below it.
- Meta Title — the blue heading in a Google result. It counts your letters for you and tells you when you are in the good range.
- Meta Description — the grey couple of lines underneath it in Google.
- Auto-fill — the small button at the top right fills both from the product name and description. A good starting point, then edit it your way.
Category#
- Open the box that says Select category to add and click a category. It appears underneath as a small grey chip.
- Do it again for as many groups as this product belongs in. A shirt can be in Men's and in New Arrivals at the same time.
- To take one off, press the small × on its chip.
Pricing & Inventory#
| Box | What to put in it |
|---|---|
| Price | What the customer actually pays today. Numbers only. |
| Original Price | The crossed-out “was” price shown next to it, so the customer can see the saving. Leave it empty when the item is not on sale. |
| Stock | How many you have right now. At 0 the website says Sold out and nobody can order it. |
Barcode, SKU and Unit#
- Barcode — if the packet already has one printed on it, scan it into this box with your scanner and it is kept exactly as it is. Leave it empty and one is made for you when you save, so loose goods can still be scanned at the counter.
- SKU — your own product code, the one on your old register or stock sheet. Nobody but you sees it. Optional.
- Unit — how this item is counted: Pieces (pcs), Kilogram (kg), Gram (g), Litre, Dozen or Pack.
Cost price and the low-stock level#
- Cost price (purchase) — what YOU paid for it. It is used to work out your profit in the reports and is never shown to a customer.
- Tell me when it drops to — the level at which THIS item counts as running low. Leave it empty and the store default is used.
- Sell by weight — turn it on for loose goods sold per kilo, like flour or mithai. The boxes above change wording as soon as you do.
- Show on till (quick key) — for things with no barcode at all, like a fresh samosa. It appears as a tile on the counter screen so nobody has to search for it in front of a queue.
Media — the pictures#
Three dashed boxes side by side. A good photo sells more than anything else on the page, so this is worth the effort.
- Press Upload Cover photo and choose the main picture. This is the one that shows on the shop grid and in the cart.
- Press Upload Product photo for the rest — you can pick several files at once. These become the extra pictures a customer swipes through.
- Upload Video is optional. It accepts .MP4, .MOV, .AVI and .WMV.
- Each picture gets a small bin icon in its corner — press it to remove that one.
Specifications#
A small table of facts shown on the product page — Material / 100% Cotton, Warranty / 1 year. Press + Add specification, fill the Label and the Value, and repeat. Skip it entirely if it does not suit what you sell.
Visibility, then saving#
Show on website is on by default. Turn it off and the item still sells at the counter, it just never appears on the public site. (Shops with no website do not see this switch at all.)
At the bottom of the form there are three buttons.
| Button | What happens |
|---|---|
| Cancel | Throws away what you typed and takes you back to All Products. |
| Save as Draft | Saves it where only you can see it. Nobody on the website can. You land on Draft Products. |
| Publish | Puts it live on the website straight away. On an existing product this button reads Update & Publish. |
Changing a product later#
- Open Manage Product → All Products and find it — the search box takes a name, a barcode or an SKU.
- Click anywhere on its row, or press the pencil. The same form opens with everything already in it.
- Change what you need and press Update & Publish. The eye button next to it opens the product on your live website, so you can check it looks right.