Writing a post
The New Post form box by box: title, the writing area, cover image, category, the search-engine boxes, and publishing.
The blog is switched on shop by shop. If there is no Blog in the menu on the left, it is simply off for your shop — nothing is broken. Ask your provider if you want it turned on.
What the blog is for#
A blog post is an article on your own website — not a product, nothing to buy. You write about something your customers ask you about, and it sits on your site as its own page with its own web address.
What "it helps you show up on Google" actually means
Google can only show pages that exist. If someone searches a question and you have written a page that answers it, that page can be shown. Every article is one more page of yours that could match somebody's search. That is the whole idea — and it is slow. Nobody, including us, can promise you a position in Google or a number of visitors.
- Write about what people ask you at the counter or on WhatsApp. Those are the exact words they type into Google.
- One good article a month beats ten thin ones. There is no reward for writing something nobody would read.
- Link the products you sell inside the article, so a reader can go straight from reading to buying.
Who can write posts#
The owner account, an Admin and a Manager can see Blog and write posts. A Cashier or an Accountant does not see it at all — the whole Blog item is missing from their menu, which is normal.
Starting a new post#
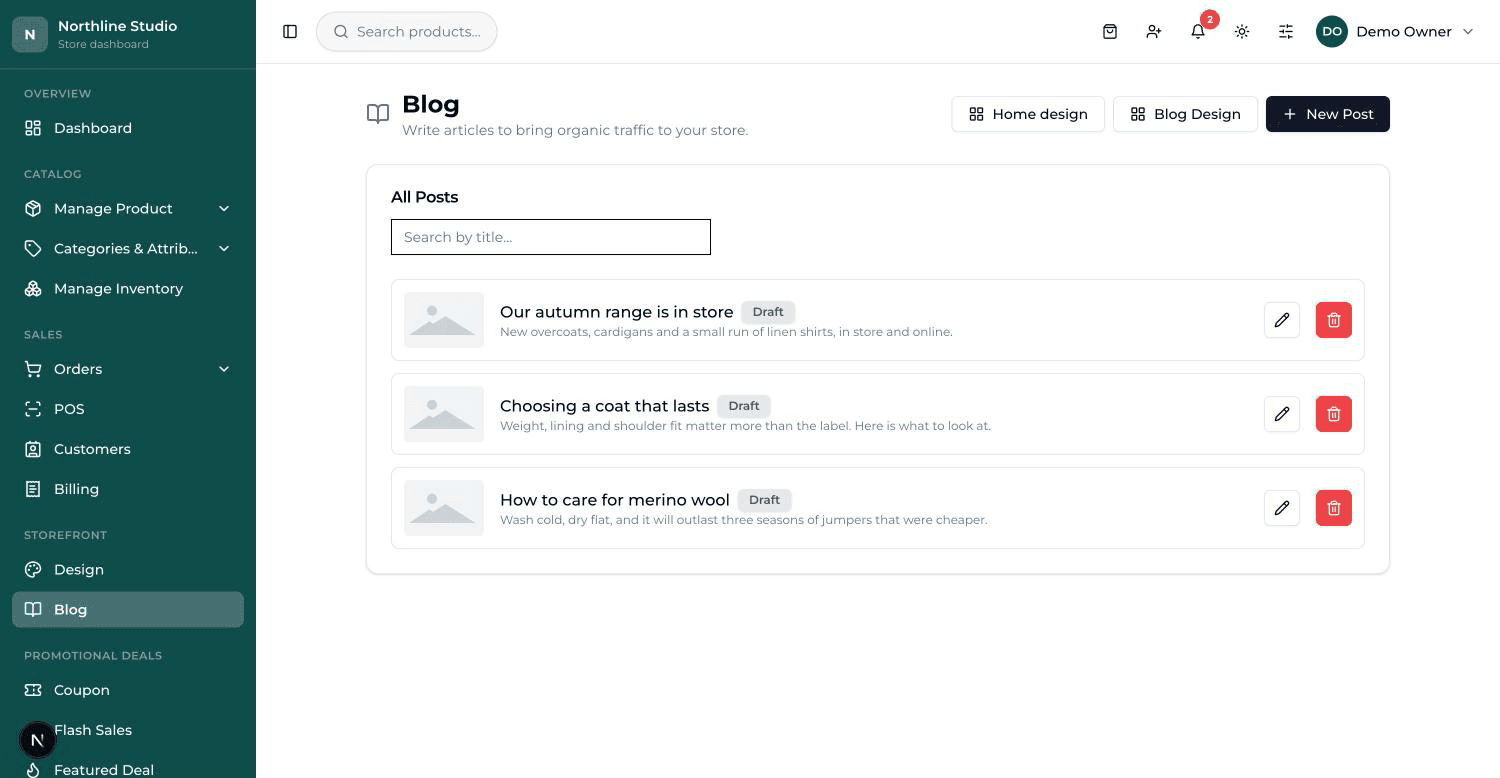
- In the menu on the left press Blog. A screen headed Blog opens with a card called All Posts — every article you have, drafts included.
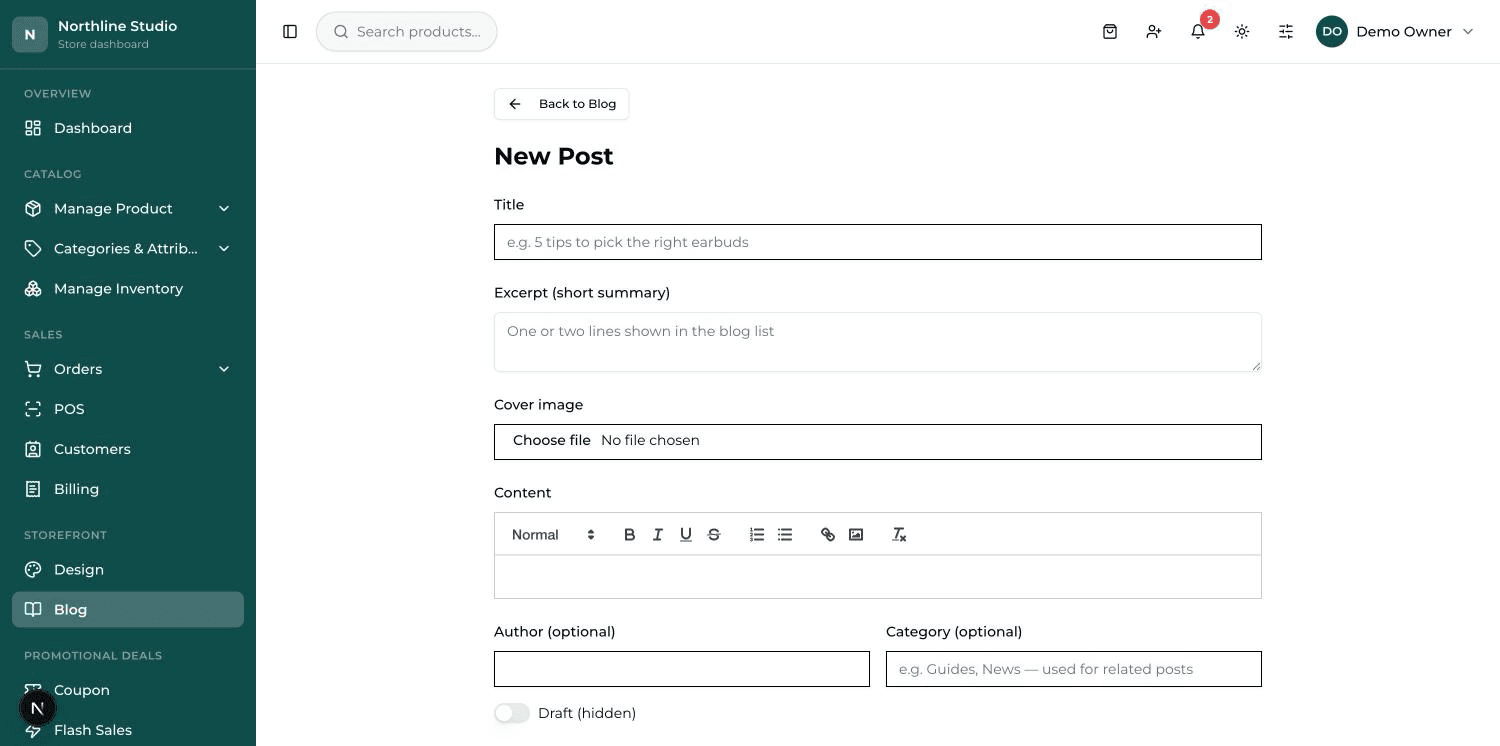
- Press New Post at the top right. The page changes to New Post — a single long form.
- Fill it from the top down. Only Title is required; everything else can be left for later.
- Press Create post at the bottom. You come back to the Blog list and your article is the first row, with a grey Draft badge next to its name.
Title — and the web address it makes#
Write the title the way a person would say it, or search for it: 5 tips to pick the right earbuds. Not Article 3.
The title also makes the article's web address — the slug, which is the short bit after your domain name. You never type it: 5 tips to pick the right earbuds becomes /blog/5-tips-to-pick-the-right-earbuds. There is no box for it on the form, so the way to see it is to open the article on your live site.
Excerpt and Cover image#
- Excerpt (short summary) — one or two lines. This is what a visitor reads under the title in the blog list, before deciding to open it. Leave it empty and that space on the card is simply blank.
- Cover image — press the file box, pick a picture from your computer or phone, and wait for Uploading… to finish. A small preview appears; the bin on its corner removes it.
Content — the writing area#
The box marked Content is a small word processor. Type straight into it, or paste from anywhere. The strip of buttons on top is all you get, and it is enough.
- The first dropdown makes a line into a heading — Heading 1, 2, 3, or Normal for ordinary text. Headings break a long article into parts people can skim.
- Then bold, italic, underline and strike-through.
- Then the two list buttons — numbered and bulleted.
- The link button turns the selected words into a link — this is how you send a reader to one of your products. The picture button puts a picture inside the article.
- The last button clears formatting from whatever you have selected. Useful straight after pasting from Word or a website.
Author and Category#
- Author (optional) — whatever you type here is printed under the title on the article. It is plain writing, not linked to any login, so it can be a person's name or your shop's name.
- Category (optional) — also plain writing, like Guides or News. It has one job: at the bottom of an article, posts with the same category are offered first as Related articles.
Draft or Published#
The switch next to Author and Category decides whether customers can see the article. A draft is a post you have started but not put on the website; published means it is live. A new post starts as Draft — it says Draft (hidden) next to the switch. Turn the switch on and it reads Published (live).
The SEO box — what those three fields are#
Near the bottom is a box headed SEO (optional). It is genuinely optional — leave the whole thing empty and your article still works. What it controls is the wording Google shows about this article in its results.
| Box | What it is |
|---|---|
| Meta Title | The blue heading of your article in a Google result. Leave it empty and your article title plus your shop name is used. It counts your letters and tells you when you are in the good range (50–60). |
| Meta Description | The grey couple of lines underneath it in Google. Leave it empty and your Excerpt is used; no excerpt either, and the first lines of the article are used. |
| Focus Keyword | The one phrase you want this article to be found by, like mobile buying guide. |
Changing a post later#
- Open Blog. The All Posts card lists everything, ten to a page, with a Published or Draft badge on each row.
- Cannot see the one you want? Type part of its name in Search by title… above the list.
- Press the pencil on that row. The same form opens with everything you wrote already in it.
- Change what you need and press Save changes. A green message says Post updated and you come back to the list.
- Now open the article on your live website and check it reads the way you meant.
Deleting a post#
- On the Blog list, press the red bin on that row.
- A box asks Delete post? and names it. Press Yes, delete only if the name is the one you meant.