Stock and inventory
How much is left, the screens that show it, the low-stock bell, and changing many products at once.
One shop, one shelf
Your website and your counter share the same stock. Sell the last piece over the counter and the website stops offering it a second later. That is the whole point — you never count anything twice.
Where to see what is left#
| Screen | What it is good for |
|---|---|
| Manage Product → All Products | The everyday list. Four coloured cards on top: Total Products, In Stock Products, Low Stock Products, Out of Stock. |
| Manage Product → Stock Products | The same products with a Quantity and a Last Updated column, plus a Download button that saves the list as a file. |
| Manage Inventory | Stock and how many have SOLD, side by side — the Sold Out column. This is the one to open before placing an order with your supplier. |
On all three, the coloured badge next to a number says the same three things: Available stock in green, Low Stock in amber, Out of Stock in red.
When does something count as low?#
By default anything at 10 or fewer is Low Stock. That is a fine rule for shirts and a useless one for a 40 kg sack, so each product may carry its own level.
- Open the product from All Products.
- In Pricing & Inventory find Tell me when it drops to and type your number — 60 for the burger buns you never want to run out of.
- Press Update & Publish. That product now turns amber at 60 instead of 10.
The bell at the top#
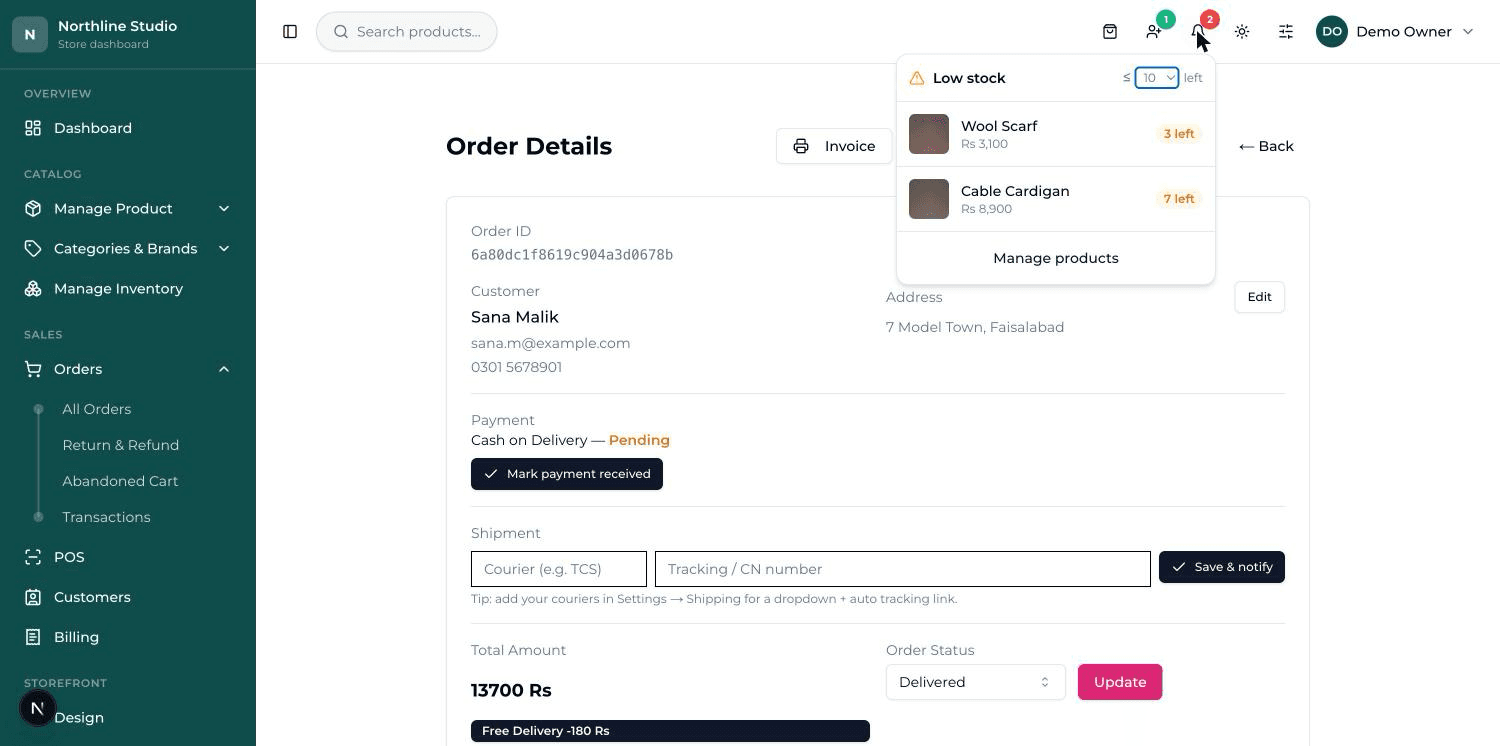
The bell in the bar across the top of the dashboard is your running-out list. A red number on it means that many items are close to finishing.
- Click the bell. A small panel headed Low stock opens with the products, their price and how many are left.
- Click any row to open that product and change its stock.
- The small ≤ box at the top right of the panel switches the warning line between 5, 10, 20 and 50.
- Nothing to worry about? It says “All good — nothing running low.”
If you have more than one shop#
With two or more branches, Manage Inventory grows a Per branch column showing how the same stock is split between them — Main 12 · Shop 2 4 — and the main column is headed Stock (total). With one shop you never see any of this.
Changing prices or stock on many products at once#
- Press Bulk edit at the top of All Products. A table opens with Name, Barcode, Price, Stock and Cost, and the last three are typed straight into the table.
- Search first if you only want part of your list — the search box takes a name, a barcode or an SKU.
- Change as many rows as you like. The counter at the top says how many are changed.
- Press Save changes. Discard changes throws them all away instead.
The same screen can also move products between categories. Tick the rows, choose the categories from the dropdown, then pick Set, Add or Remove and press Apply.
| Choice | What it does |
|---|---|
| Set | Replaces whatever categories those products had. |
| Add | Keeps their categories and adds these. |
| Remove | Takes these off; the rest stay. |